
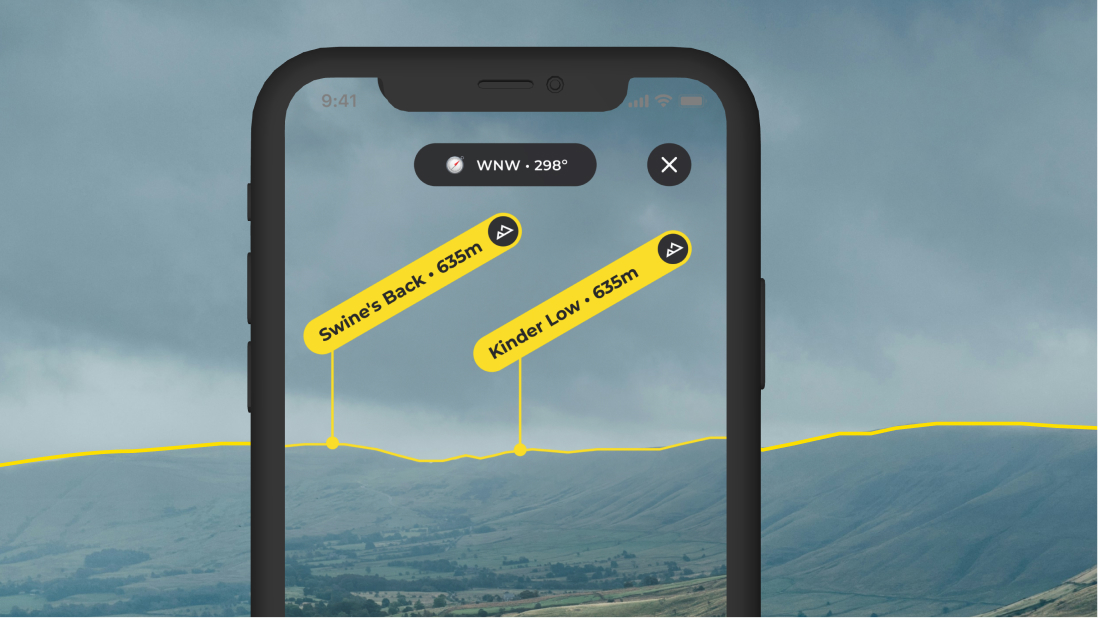
You know the shape. The long whaleback to the south-west, the pointed one behind it, the ridge that closes off the valley. You’ve looked at them from this spot a dozen times and you still couldn’t name one of them.
Hold your phone up and HiiKER names the lot.
Point it at the horizon
Peak Viewer reads where you’re standing, which way you’re facing and how the land actually rises around you, then labels every named summit in view with its name and its height. Not a guess at the general direction: hold the phone still for a moment and the labels snap onto the skyline the camera actually sees, then stay on it as you pan.
It works on what you can genuinely see. Summits hidden behind a closer ridge don’t get labelled, because from where you’re standing they aren’t there.

Fit it to the view in front of you
- Set how far it looks. The slider along the bottom runs from 5 to 60 km. Pull it in to tidy a busy skyline, push it out on a clear day.
- Check your heading. The compass at the top shows which way you’re facing, like NW · 315°. Tap it to reset to true north. If the compass is struggling, it’ll ask you to move your phone in a figure-8.
- Nudge it by hand. Drag to line the labels up, pinch to zoom in on a distant ridge, and double-tap to reset.
- Choose what’s drawn. Under Options, turn the horizon line or the peak labels on and off.
Capture the view and share it
Tap the camera button and Peak Viewer takes a photo with the labels and the skyline drawn on, then opens your share sheet. Send it to whoever you’re walking with, or keep it as a record of what you could see from the top. Capture is part of a HiiKER subscription.
Tap a label and get the whole story
Every label opens. Tap one and you get the summit’s height, how far away it is, its coordinates, and — if it belongs to a round you’re working through — exactly where it sits in that list and whether you’ve already stood on it. Rounds and lists come from peak bagging.
From there you can save it, plan a route to it, take a bearing on it, or open it in 3D and fly around it before you commit to the walk. It’s the same peak details screen you get everywhere else in HiiKER.

The ones you’ve bagged light up
Summits you’ve already been up draw in yellow. The rest stay grey. Stand somewhere with a wide view and the horizon turns into a scorecard — everything you’ve done in one colour, everything still waiting in the other. The colours follow your bagged peaks.
It’s a quietly effective way to pick your next walk. The grey one that keeps catching your eye is usually the answer.

Or read it off the terrain
Cloud in, or you’d rather work it out at the kitchen table? Tap the map button and the same summits sit on 3D terrain around you, in whichever map style you like. Tap any one for its details, just as you would through the camera.

Where to find it, and your free look
Open the map, tap Options, then Peak Viewer. You can also set it as your map’s Quick Action, so it’s always one tap away.
The first time you land on the map you’ll get a card introducing it with a Try it out button, and that one’s on us whether you subscribe or not. Every walker gets a free look before deciding.

After that, Peak Viewer comes with HiiKER PRO+, alongside the rest of the map collections and planning tools.
It needs a signal the first time you use it in a place. After that, the peaks and terrain around that spot are saved on your phone, so it can usually work there again without one.
Terrain data © Mapterhorn.